Enabling Office 365 Federation
Do the following steps to enable Office 365 federation:
- Open PowerShell with Run as Administrator. If you have not installed PowerShell, see Installing PowerShell and Azure AD.
Run the following command to connect to Microsoft Office Online Service:
PS C:\Users\Administrator> Connect-MsolServiceYou will be prompted for Office 365 global admin credentials. Input your Office 365 admin credentials to establish the connection.
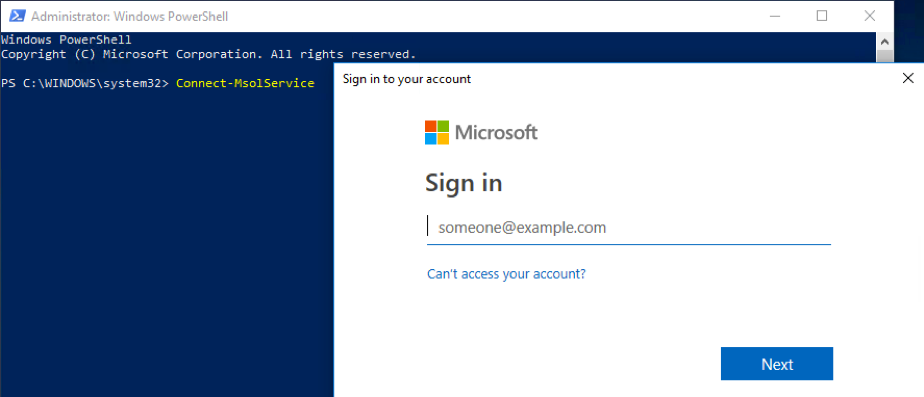
Fig 1: Establish MsolConnection On PowerShell, check the current domain name in your Office 365 tenant with the following command:
PS C:\Users\Administrator> Get-MsolDomain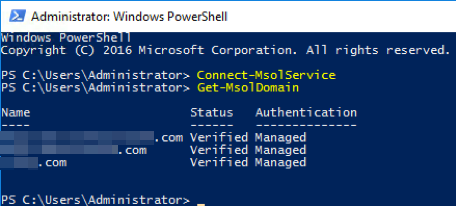
Fig 2: Output from Get-MsolDomain Command Declare information and parameters to be used for federated authentication, e.g.
saleallplanet.com, with the following commands:PS C:\Users\Administrator> $domainname = "saleallplanet.com" PS C:\Users\Administrator> $logoffuri = "https://cloud.v-key.com/sso/o365/sign-out" PS C:\Users\Administrator> $passivelogonuri = "https://cloud.v-key.com/sso/o365/sign-in" PS C:\Users\Administrator> $cert = "---CERTIFICATE CONTENT---" PS C:\Users\Administrator> $issueruri = "https://cloud.v-key.com/sso/o365/metadata" PS C:\Users\Administrator> $protocol = "SAMLP"Switch that domain name to use Federated Authentication with the following command:
PS C:\Users\Administrator> Set-MsolDomainAuthentication -DomainName $domainname -FederationBrandName $domainname -Authentication Federated -IssuerUri $issueruri -LogOffUri $logoffuri -PassiveLogOnUri $passivelogonuri -SigningCertificate $cert -PreferredAuthenticationProtocol $protocolCheck again the current domain names in your Office 365 tenant after switching to federated authentication with the following command:
PS C:\Users\Administrator> Get-MsolDomainThe output should show the domain being federated as follows:
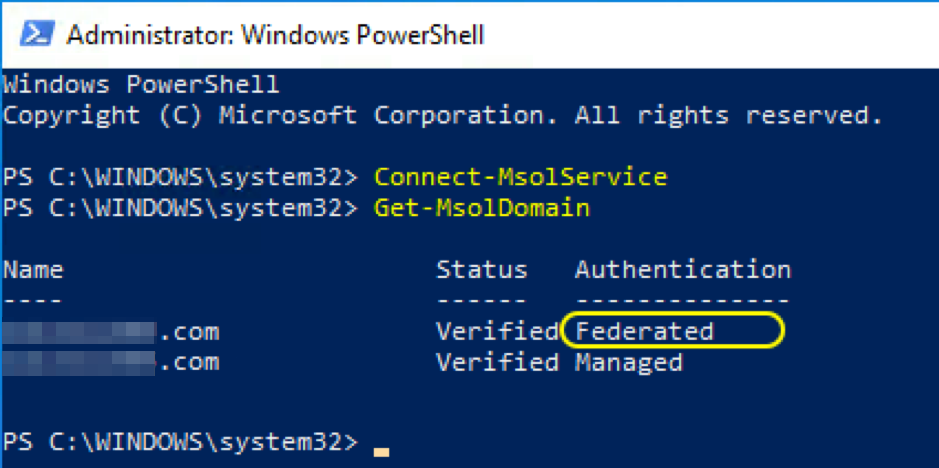
Fig 3: List Domains after Federation In the Azure AD portal, you can verify the same information.

Fig 4: List Domains on Azure Note: Please be noted that user accounts cannot be created manually with Federated domain in Office 365/Azure AD Portal. Users with Federated domain in Office365/Azure AD can only be generated by synchronization from On-Premise Infrastructure.
After federation is succeeded, go to
www.office.comfrom your browser.- Select the Sign in button at the upper-right corner of the page.
Input your email address on the Sign in page and select next.
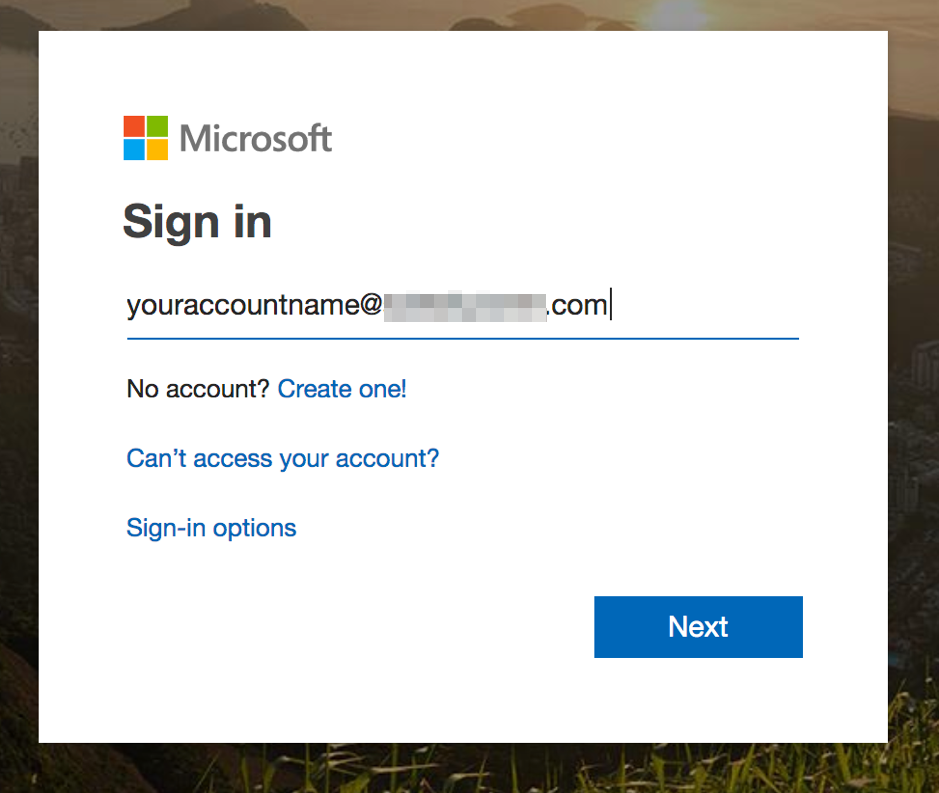
Fig 5: Office 365 Sign in Page If you are redirected to VCAG's Login page, your federation is successful. Otherwise, double check your federating parameters.
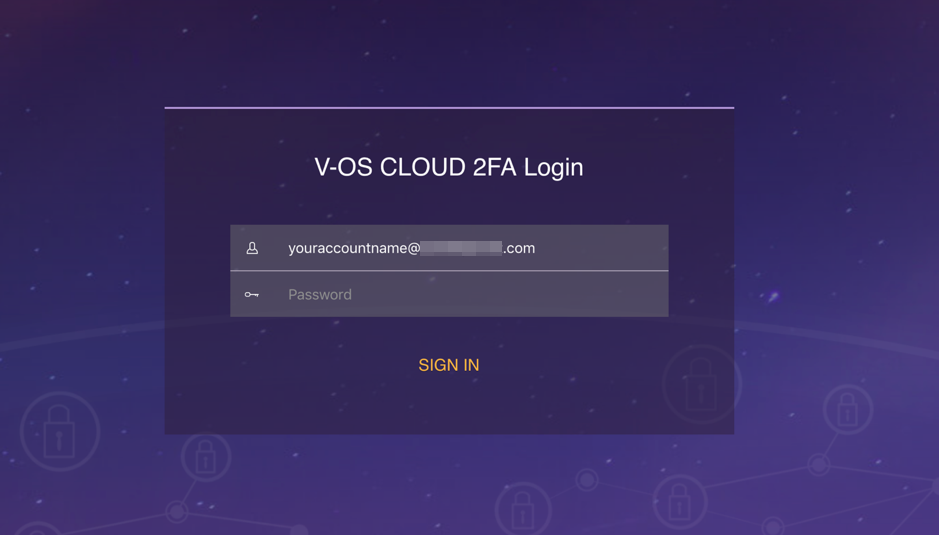
Fig 6: VCAG Login Page